Tahiti's 3 Best Hikes!
Hike 1: MONT AORA'I --- Ridgeline Vistas
Hike 2: FARAURA VALLEY --- Cascading Waterfalls
Hike 3: MT MARAU --- Sunrise views
Close your eyes and picture Tahiti (French Polynesia) and you'll conjure images of overwater bungalows, beautiful beaches, and crystal blue waters. And, these images would be spot on. The often overlooked and best part of Tahiti lies in its interior.
The island is wild; waterfalls cascade down steep mountainsides, valley floors are covered in gigantic ferns, and rivers wind their way to the coast. You don't often get to experience the untouched remoteness of a place like you do when exploring the interior of Tahiti.
The hiking is AWESOME!
Hike 1: Mont Aora'i
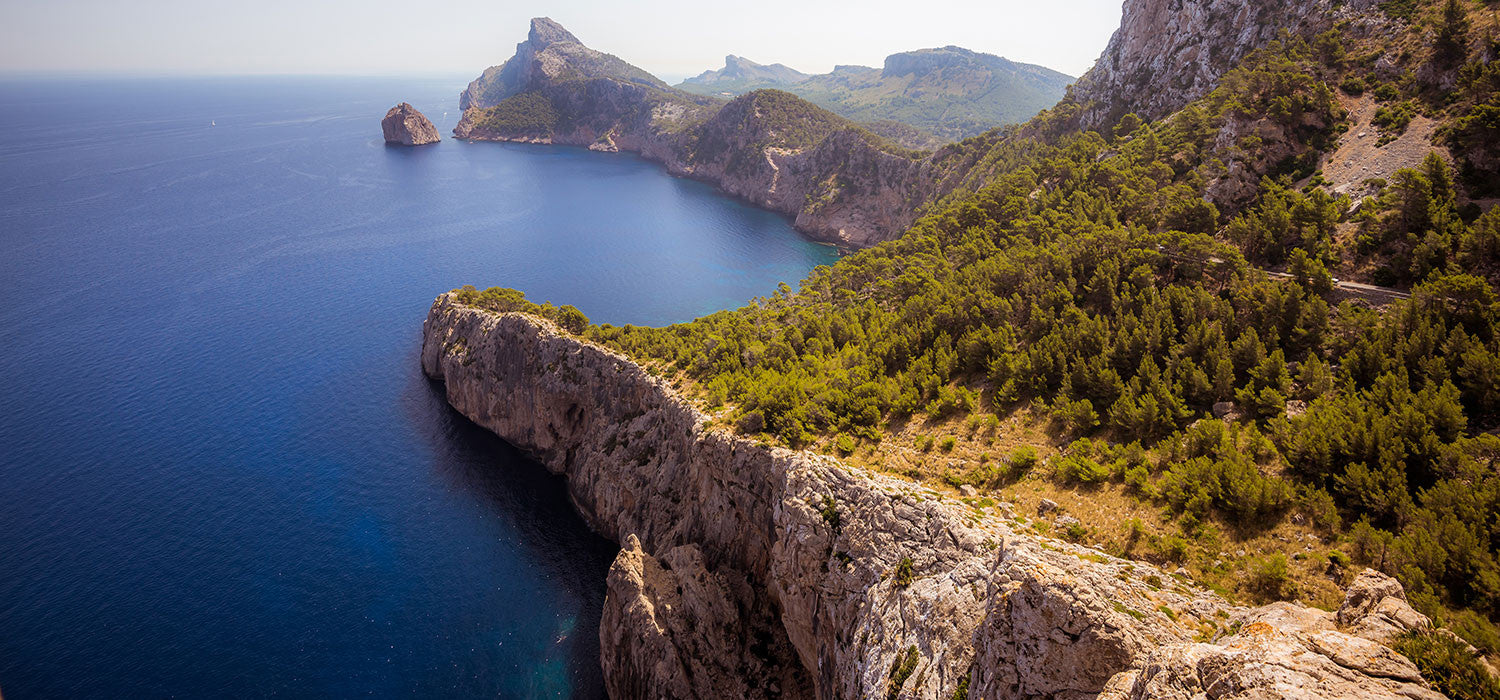
Mt Aora'i is the 3rd highest peak in Tahiti. From its steep and narrow ridgelines, you can take in the views of Papeete and Fa’a’ā below and marvel at the sight of Moorea. This hike is hard but exhilarating.
Finding the trailhead is the first part of the journey. You will need a car or you can hike the 10km/6 miles from downtown Papeete and call it your warm-up, but clearly, this is not ideal.

Elevation: 6778 ft / 2066 m (7,454 ft elevation gain)
Distance: 9.5 mile
Eta: 10+ hours

The Hike: The trailhead starts from the parking lot just north of O Belvedere. Walk behind the old military dwelling and past the roosters and you will see a decently worn path.
Be prepared, this hike is not for the faint of heart, but it is worth every step. It is long with considerable elevation gain. You will hike through a rainforest, along the steep ridgeline high above the trees, ascend parts of the trail aided by fixed ropes, which was awesome and scary all in one and see some of the best views of Tahiti and Moorea than you can imagine.
The trail is fairly straightforward until you reach Fare Mato, the first refuge along the trail. After that, it becomes more precarious. The ridgeline narrows to less than a foot in parts with very sharp drop-offs. The thick foliage provided enough cover for me not to panic at the sight of the looming drops. You will need to use the fixed ropes and chains to ascend, descend and traverse. Note: A landslide washed out part of the trail but there were ropes affixed to the side so you could scamper to the other side of the trail. This is not for the faint of heart. It was very scary and dangerous. Proceed with caution.

No camping is allowed, but there are two huts if you choose to overnight, Fare Mato (1400m) and Fare Ata (1800m). When we hiked, there was a water catchment tank at Fare Mato, so we were able to refill our water bottles. Do not drink this water without some form of sterilization. We used our Steripen and it worked wonderfully. I can’t guarantee these tanks always hold water so pack enough water for the long hike.
Check the weather before hiking. This ridgeline hike is full of some of the most epic views of the island. The closest weather reading will come from Papeete, which is warmer and dryer than the mountain. Bring layers as you are on an exposed ridgeline and when the wind blows, it is cold.
Note: November - March is very wet. It is not recommended to hike the trail during the wet season.
What to bring: Pack a lunch and take in the views from the picnic table found at Fare Ata hut. Wear a hat as most of the trail lacks overhead sun coverage. Long pants are recommended as the ferns are huge and out for blood. I wore shorts with long socks and while the long socks helped, my legs were mangled with cuts by the time we were done with the hike.
Layers! This hike is hot, cold, windy, rainy, you name it. When the clouds roll in, the weather changes on a dime. I chose to bring hiking poles and for the most part, they were a great aid. Some of the rope climbs were awkward but not impossible with the poles in hand. Don’t forget that camera! You will definitely want some photos of the epic views.

Recommendation: Make a lunch reservation at O Belvedere for after the hike. Emphasis on the reservation. This place gets surprisingly busy. And trust me, a cold beverage and a snack while taking in the views are the perfect way to decompress from this epic hike. A clean shirt will feel fabulous after such a long hike, so leave a spare in the car. Wipe down with some baby wipes, change that shirt and you are ready for O Belvedere.
O Belvedere often has live DJs. Check their Facebook page for the latest event schedule.
Directions to Mont Aora'i Trailhead:
By Car: Head out of Papeete toward Pirea. The drive is a bit complicated and will take about 30 min. From Papeete, follow Rue des Remparts to Ave du Prince Hīnoi. Turn left onto Ave du Prince Hīnoi. Turn right onto Cr de l'Union Sacrée.Turn left onto Av. Georges Clémenceau. Continue onto Av. Ariipaea Pomare Drive to Rte du Belvédère- At the roundabout, take the 1st exit onto Rue Anthony Bambridge.
You are now in Pirea and should see signs for O Belvedere, the restaurant located adjacent to the trailhead parking lot. - Turn right onto Route Fare Rau Ape/ Rte du Belvédère and follow the steep, curvy, poorly maintained road for about 5 km.
By Taxi: This will be expensive, but you can have a taxi drop you off at the trailhead. Make sure to schedule a pick-up time for later in the day. This will run roughly $65+.
Hike 2: Faraura Valley
Faraura Valley offers a glimpse into Tahiti’s wild interior. Towering mountains covered in foliage, a river that guides the way, and waterfalls delight your eyes and cool your body along the journey.
Like most hikes in Tahiti, the trailhead can be hard to find. You will need transportation, car/bus/taxi to reach this hike as it is on the sparsely populated east side of the island.

Elevation Gain: 2,027 ft
Duration: 6.8 miles
ETA: 4 to 5 hours
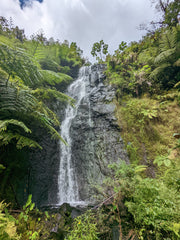
The Hike: This picturesque hike, where the native foliage adds a mystical and mysterious vibe to the hike, takes you up the valley along and across the Mahateaho River for a couple of kilometers. Plan on getting your feet wet. There are multiple river crossings but no worry, the water was seldom more than calf deep. It is so much fun! Keep an eye out for cairns that mark the trail as you zigzag up the river. This hike is not to be attempted unprepared. While the start of the hike provides an easy walk with a scenic atmosphere, the trail grows gradually harder with some hairy points that require a good physical condition to navigate the steep, rope-assisted inclines. At the end of the hike, your efforts are rewarded when the spectacular and tallest of all the waterfalls at 200m comes into view.
What to Bring: Inland Tahiti is wild. There is no cell service. Hikers are few and far between. Weather is unpredictable. Bring a hat, pack provisions, plenty of water, layers, insect repellent, a towel, and fresh socks. I always like to have a small first aid kit on hand in case of a fall or sometimes worse yet, a blister. Don’t forget your camera.

Note: A bit of duct tape is useful on blisters, especially when you have so many water crossings. Apply the band-aid or moleskin over the blister onto dry skin and then cover it with duct tape.
Check the weather before hiking. It is not recommended to hike this trail during the wet season, Nov- March.
Recommendation: Throw your sandals in your car or your bag. With all those river crossings, you will want to take your shoes off before the journey home.
Directions to Faraura Valley Trailhead:
By Car: There is one main road that circumnavigates the island, Route Ceinture (Rt 2). From Papeete, head east out of the city and take Route Ceinture to Hitiaa O Te Ra. This will take about an hour depending on traffic. Take a right at the church, Eglise du Sacré Coeur Hitiaa, onto Iles du Vent and drive for approximately 1.5km. The road is unpaved and in slight disrepair but passable. Be respectful of the locals that live adjacent to the road, you are in their neighborhood now. Stop when you come to the river and park in the open area. You will need to cross the river to get to the start of the trail.
By Bus: The Tere Tahiti Line 31, Taravao East, is the line you want to take. We took the bus from Mahina to the Hitiaa O Te Ra bus stop. It was very straightforward with no stops. From Hitiaa O Te Ra, head down the road adjacent to Eglise du Sacre. The walk to the trailhead is roughly 1.5km. Be aware not to miss your return bus.
Hike 3: Mt Marau

Elevation gain: 4,914 ft
Distance: 12.6 mile
ETA: 9 hours

The Hike: This hike is a bit bizarre. You will pass the Tefana Shooting Club which seems wildly out of place. The foliage changes as you gain elevation and there is a lot of elevation gain; wild grasses and open views to wide paths with towering trees and brush. It is well-marked and easy to follow. The views into the island's interior took my breath away with their sheer wildness.
There is a small, flat, grassy area adjacent to the old observation dome which makes for a great picnic location. Take in the views, enjoy a nosh, and then continue to the communications tower a couple of miles up the trail.
This trail is often frequented by bikers as well. You will be moving faster than most on the way up to the tower, but on the way down, beware of quickly descending cyclists.
What to Bring: As with most hikes in Tahiti, the environment is rustic and remote. Pack provisions, plenty of water, and layers.

Recommendation: Start the hike before dawn. Not only will you witness a beautiful sunrise, but you will beat the clouds. Once those clouds roll in, as early as 9 am, your views are shot. Compression socks or sleeves proved to be a winner on this steep hike. They made the next day's recovery that much better.
Directions:
From Fa’a’ā On Foot or By Car: There are two ways to start this hike. Since we were living up in the hills of Fa’a’ā, near St. Hilaire cemetery we walked up the hill for roughly 1.5 miles, past the Mumavai Golf Practice ‘driving range,’ to the trailhead aka dead-end in the road. You can also drive up this unnamed road and park. It looks a bit dodgy, but we never had any problems. Follow the trail that goes straight up.
From Puna’auia By Car: An alternative and more common access to the hike is from Puna'auia. Heading north from Puna’auia take a right just past the Church of Jesus Chris of Latter Day Saints. Take the next right and follow the road uphill for almost 4 km. You will eventually dead-end into the trailhead parking lot aka ‘parking de depart des randonnees.’
The two trails eventually merge to become the main trail up to Mt. Marau.
Happy Hiking!
(Maps attributed to AllTrails)